



The Ninja Crispi works in four steps: crisper plate in the bottom of the glass container, food on top, PowerPod on the container, then a mode and a time. There is no temperature to set: the basic Crispi does not have one.
This user guide follows my Crispi FN101, the one with 1.4 L and 3.8 L containers. Assembly, control panel, modes, preheating, glass and cleaning: everything you need for your first cook, then what changes on the Crispi Pro and the DualZone.
Assembling the Crispi: crisper plate, container, adapter, PowerPod
In my kitchen, every centimetre of worktop counts, and the Crispi assembles in a few seconds. The order of the parts is especially important with the large container.
- Place the crisper plate in the bottom of the container: the small one in the 1.4 L, the large one in the 3.8 L.
- Add your food, seasoned or marinated: you can marinate directly in the container.
- 1.4 L container: place the PowerPod directly onto the container, without the adapter.
- 3.8 L container: first clip the PowerPod onto the adapter until it clicks at the front and back, then set the whole unit on the container.
- Choose the mode, set the time and start cooking.
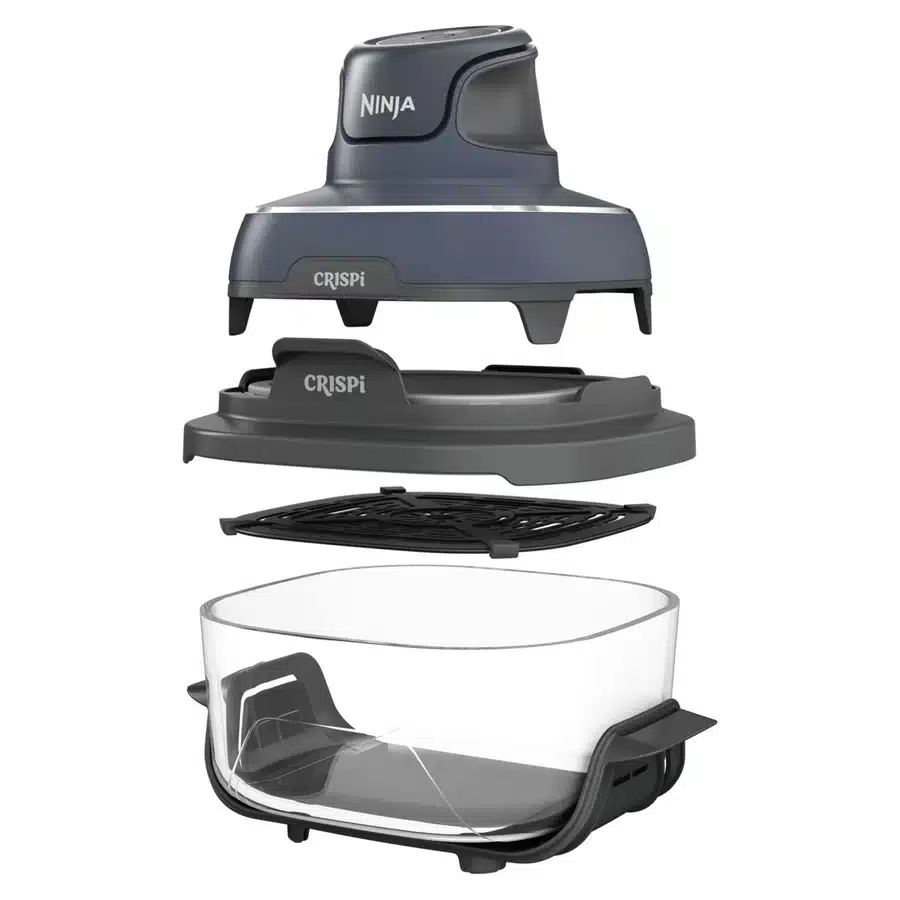
The adapter must be used with the 3.8 L and never with the 1.4 L. If it is not clipped in properly, the screen shows LID, just as it does when the PowerPod is badly placed.
The PowerPod detects the container being used and adjusts the cooking temperature. In practice, for the same food, cooking times change from one container to another: follow the times for your container.
During cooking, keep 15 cm of clearance around the unit and above the vent. This assembly is for the FN101. The FN201, which comes with 2.3 L and 3.8 L containers, has no adapter in the box.
The panel: three controls, no temperature
The basic Crispi’s control panel comes down to START/POWER, MODE and TIME − / +. On my first try, I looked for the temperature button, an old reflex from the fan ovens of professional kitchens. It doesn’t exist: you choose a mode and a time.
For a recipe written in degrees, the method is in my guide to cooking without a temperature setting. To start cooking:
- Switch on: START/POWER.
- Choose the mode: MODE, as many times as necessary.
- Set the time: each mode starts with a suggested time, adjustable with TIME − / + before or during cooking.
- Start: START/POWER.
To turn food over, lift the PowerPod: cooking pauses. Turn once or twice with silicone-tipped tongs, replace the PowerPod and press START.
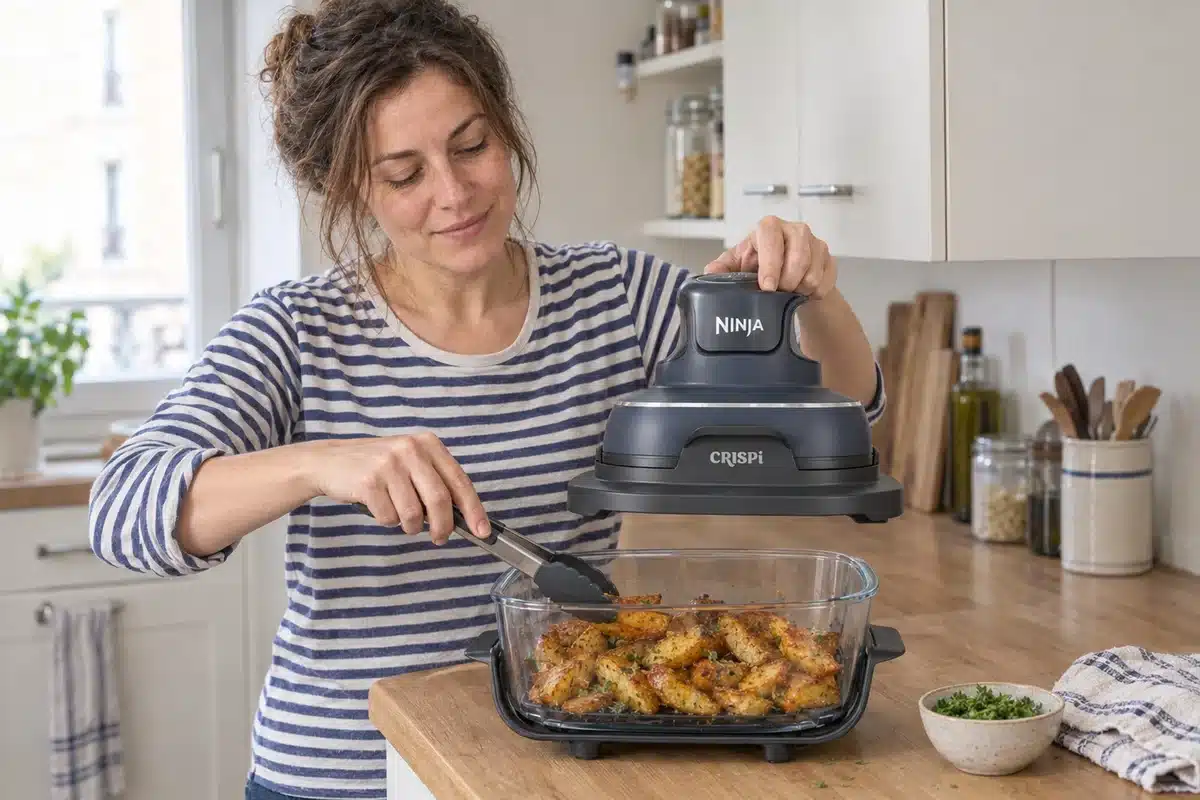
At the end of cooking, the PowerPod beeps and displays END. To turn it off, hold START/POWER for 4 seconds; if left idle, it goes into standby after 10 minutes.
The 4 modes, from the gentlest to the hottest
- Keep Warm: keeping a cooked dish warm, warming up bread and pastries. It is the only mode with a published temperature: 70 °C.
- Recrisp: leftovers, dense dishes and cheese-topped bakes, precooked proteins and vegetables, pizza. Never for frozen food.
- Roast: large cuts, such as a whole chicken or a beef joint.
- Air Fry: fresh or frozen chips, nuggets, small proteins. It cooks like an oven at 200 °C.
In Recrisp, I apply a catering rule: what only needs heating goes under the crisper plate, what needs to be crispy goes on top. One layer at the bottom, the plate, one layer on top.
In Roast, the 3.8 L holds a whole chicken of about 1.2 kg; up to 1.5 kg, you can butterfly it or cut it in half. The step-by-step is in my whole roast chicken recipe, and each food has its own mode in the Crispi modes guide.
Preheating: never mandatory, useful in three cases
The instruction manual is clear: the Crispi does not need to preheat. The Quick Start Guide, however, recommends preheating empty for 5 minutes in three cases, for a better sear or a crisp base.
- Roasted cuts, preheating in Roast: whole or butterflied chicken, whole chicken legs, pork tenderloin, pork joint, rack of lamb, beef, duck. A large salmon fillet does not need it.
- Steaks, before cooking in Air Fry.
- A slice of pizza, quiche or tart to reheat in Recrisp, with the crisper plate in place. This is reheating advice, not a way to cook raw dough.
The method: crisper plate in the empty container, PowerPod in place (on the adapter for the 3.8 L), press MODE until you reach the mode you need, 5 minutes, START. When it beeps, lift the PowerPod, place the food with tongs, replace it and start cooking.
For everything else, I start from cold.
Glass containers: what to do, what to avoid
The glass goes from the freezer to the table: you cook, serve and store in the same container. A hot container can go straight onto the worktop, whether granite, laminate, quartz, wood or marble.
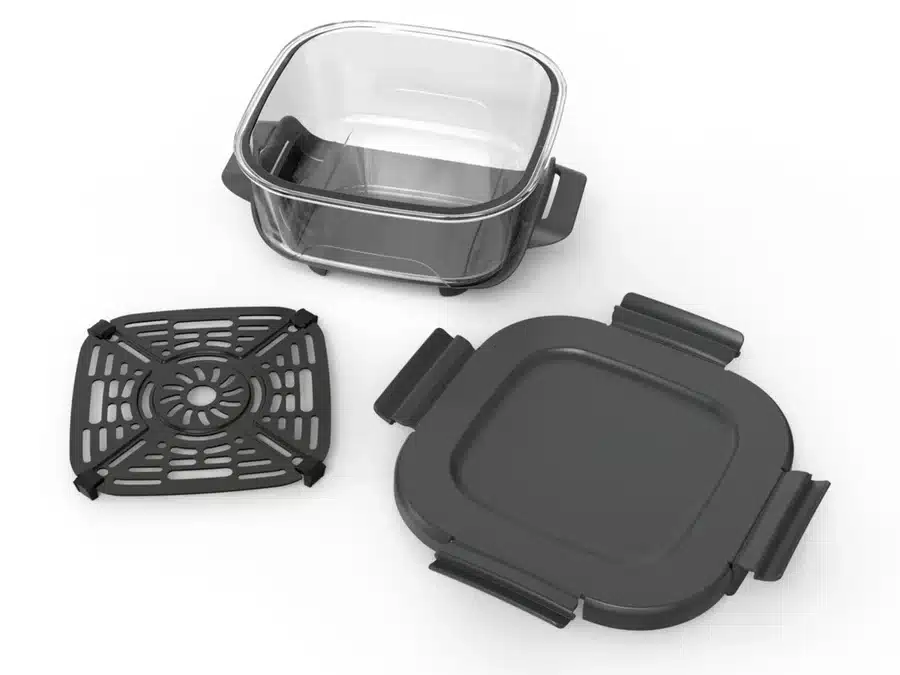
- Yes: freezer, microwave and dishwasher for the containers.
- No parchment paper in the basic Crispi’s containers: the Quick Start Guide forbids it.
- Never in an oven, on a hob or under a grill.
- No cold liquid or food in a hot container, and nothing hot in a cold one.
- The handles and the heat-resistant base are permanently attached to the glass: do not remove them.
On Sundays, I cook and portion for the week directly in the containers. One rule: let cool before closing the storage lid, never right after cooking. In the microwave, never close the lid on the container.
To reheat, the container goes back under the PowerPod in Recrisp. The 1.4 L is the right size for a portion of leftovers.
Cleaning and storing the Crispi
- PowerPod: a damp cloth after each use. Never in water, never in the dishwasher.
- Containers, crisper plates and adapter: dishwasher or hand wash. By hand, rinse well between the handles and the glass, where crumbs and soap tend to remain.
- Lids: dishwasher, top rack only.
The adapter stays hot after cooking: give it 10 minutes before handling it.
For storage, the PowerPod sits on a container. At home, the whole set fits in a cupboard, where my basket-style air fryer used to take up a corner of my worktop.
Crispi Pro and DualZone: what changes in use
My second appliance is a Crispi Pro AS101, and it works differently from the Crispi: no PowerPod, but a fixed base with a dial and screen. The container slides into the base in the position that matches its size: upper for the 2.3 L, middle for the 3.8 L, lower for the 5.7 L.
If the container is in the wrong position, the screen shows ADD POT. The temperature is adjustable, up to 240 °C depending on the mode. The Pro has Max Crisp, Bake, Prove and Dehydrate, but no Keep Warm; the 5-mode Pro has neither Roast nor Dehydrate.
During cooking, the temperature and time can be modified, but not the mode. A cycle lasts a maximum of 59 minutes, 30 in Max Crisp. Pause: press the dial or remove the container. Parchment paper is allowed in it.
The DualZone, which I don’t have at home, cooks in two 3.8 L containers set separately. Smart Finish makes two different cooks finish at the same time, Match Cook copies zone 1 to zone 2.
Its Air Fry mode tops out at 200 °C, its containers do not fit on other Crispi models, and you do not boil water in them.
To compare all five models, modes and containers included, see the Ninja Crispi models compared.
The essentials before your first cook
- Crisper plate at the bottom of the container, adapter only with the 3.8 L, clipped until the double click.
- A mode and a time: no temperature on the basic Crispi.
- PowerPod lifted, cooking pauses; START to resume.
- Preheating only for roasting joints, steaks and slices of pizza, quiche or tart to reheat.
- No parchment paper, no container in the oven, storage lid closed once the dish has cooled down.
And you: what was the very first thing you cooked in your Crispi?
Frequently asked questions
Is the Ninja Crispi instruction manual available in English?
Yes. The instruction manual for the FN101EU and FN102EU is written in 12 languages, English included, and the UK model also has a Quick Start Guide with recipes and cooking charts.
What does LID mean on the Crispi screen?
The PowerPod is poorly placed or the adapter is not properly engaged. Replace the PowerPod on the container, or re-clip it onto the adapter until the front and back clicks. If the screen displays E, it is a fault: contact Ninja customer service.
Can you open the Crispi during cooking?
Yes: lift the PowerPod, cooking pauses. Replace it and press START to resume. The time can also be adjusted during cooking with TIME − / +.
How do you cook frozen food in the Crispi?
In Air Fry, straight from the freezer, using the time in your container’s cooking chart. Never in Recrisp, which is for leftovers. On the Crispi Pro, Max Crisp is intended for frozen foods like chips and nuggets.
How many people per container?
Up to 2 people with the 1.4 L, up to 6 with the 3.8 L.
Sources
- Ninja Crispi FN102EU series instruction manual (FN101EU, FN102EU)
- Ninja Crispi FN101UK Quick Start Guide
- Ninja Crispi Pro AS101EU / AS090EU instruction manual
- Ninja Crispi Pro FAQ, AS100UK series (Ninja support)
- Ninja Crispi DualZone FAQ, DD100UK series (Ninja support)