


Which Ninja Crispi?
Mode used: Air Fry
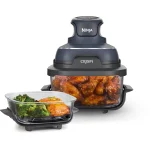 Ninja Crispi (FN101 / FN201)
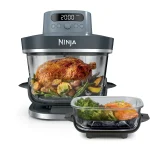 Ninja Crispi Pro (AS101)
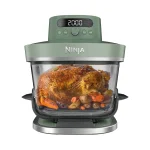 Ninja Crispi Pro (AS090)
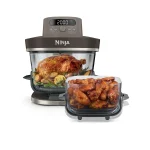 Ninja Crispi Pro Grill (AS104)
 Ninja Crispi DualZone (DD102)
Settings
- Crispi: Air Fry, no temperature setting, 23-26 min, 3.8 L container
- Crispi Pro (AS101), Crispi Pro (AS090): Air Fry, 180 °C, 20-25 min
- Crispi DualZone: Air Fry, 200 °C, 12 min, 3.8 L container
Sunday meal prep requires recipes that the whole family will love and that reheat well. The 3.8 L container of the Crispi offers enough surface area to spread a good quantity of poultry in a single layer. The challenge with air frying is the breading, which tends to scatter if it is not well fixed beforehand.
After several attempts, this is my preferred method because the crust stays attached to the chicken pieces throughout the cooking cycle. These homemade Ninja Crispi nuggets provide a very crispy result, with meat that remains moist in the centre without drying out.
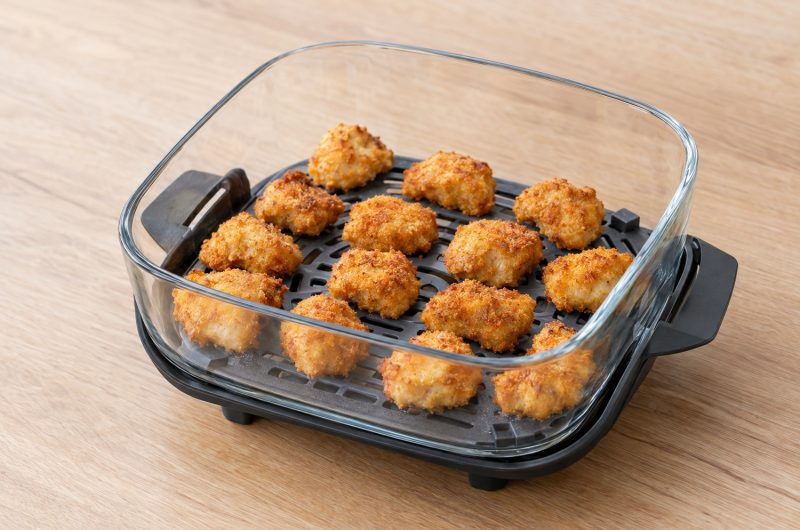
Homemade chicken nuggets in the Ninja Crispi
Course: Main courseCuisine: AmericanDifficulty: Easy4
people15
minutes26
minutes41
minutesWell-coated homemade chicken nuggets, cooked directly in the 3.8 L container with a breading that resists the air circulation.
Ingredients
4 chicken breasts (about 500g)
100g plain flour
2 eggs
150g breadcrumbs
1 tsp paprika
1/2 tsp salt
1/4 tsp pepper
1 tbsp sunflower oil (spray if possible)
Instructions
- Cut the chicken breasts into cubes of about 3 cm. Even-sized pieces ensure uniform cooking across the whole batch.
- Prepare three separate bowls: one with the flour, paprika, salt, and pepper mixed together, one with the beaten eggs, and one with the breadcrumbs.
- Coat each piece of chicken in flour, then egg, and finally breadcrumbs, pressing firmly. The breading must adhere to the meat to prevent it from coming off during cooking.
- Place the crisper plate at the bottom of the 3.8 L container and arrange the nuggets in a single, spaced-out layer. Lightly spray oil on top.
- Place the adapter and the PowerPod on the container. Select Air Fry, 23 to 26 minutes, and press START.
- Halfway through (at about 12-13 minutes), lift the PowerPod. Turn the nuggets over with silicone tongs, spray a little oil on the newly exposed side, replace the PowerPod, and press START.
- At the end of the cycle, check the colour of the breading through the glass. The nuggets should be golden and crispy. Check that the meat reaches 75 °C at the core using a cooking thermometer.
Spicy nuggets
Add cayenne pepper or chilli flakes directly into the flour bowl to get spicier nuggets.


Adjusting cooking time according to the model
Cooking breaded meat requires direct exposure to heat. The 3.8 L container allows for spacing the pieces so that air can circulate all around each chicken cube. Without this space, the edges stay moist and the breading detaches easily.
The settings vary depending on the model used, particularly regarding temperature management:
- Basic Crispi (3.8 L): launch the Air Fry mode with no temperature setting, for a total duration of 23 to 26 minutes.
- Crispi Pro and Pro 5 modes (5.7 L container): set the Air Fry mode to 180 °C for 20 to 25 minutes.
- DualZone: Air Fry at 200 °C, 12 minutes for 300 g of nuggets per 3.8 L container, turning them halfway through cooking, then check for 75 °C in the centre.
There is no need to run an empty cycle before cooking for this recipe.
Fixing the breading and browning evenly
The strong air circulation under the PowerPod can lift poorly fixed breading. A common mistake is to simply roll the chicken pieces in the breadcrumbs, leaving a thin layer that does not adhere.
To correct this, press the breadcrumbs firmly onto each piece between your hands before placing it on the crisper plate. This ensures the crust stays in place and completely covers the meat.
The other trick to get a lovely golden colour is to spray the exposed side with oil after turning the nuggets halfway through. This fine film of fat conducts heat evenly across the dry breadcrumbs, creating the expected crispiness.
Meal prep and managing leftovers
This recipe works very well for weekly meal prep. You can marinate the chicken cubes in advance with spices or a yoghurt marinade to tenderise the meat.
The glass container acts directly as a prep bowl. Place the meat and marinade (without the plate) inside, then close with the provided storage lid. Let it rest in the fridge between 30 minutes and 16 hours. When the time comes, take out the pieces, bread them, install the plate at the bottom of the container, and start cooking.
For leftovers, let the nuggets cool down completely before closing the lid. Condensation quickly softens the breading. The next day, reheat by replacing the PowerPod on the container on Recrisp mode for 5 to 8 minutes.
What sauce do you serve with your homemade nuggets?
Frequently asked questions
Can I use frozen nuggets?
Yes, but the settings differ. On the basic Crispi, allow 12 to 15 minutes on Air Fry for 600g. On the Crispi Pro, use the Max Crisp function at 240 °C for 15 to 20 minutes for 900g. On the DualZone, use Max Crisp for 10 to 12 minutes for 300 g per container.
How can I prep the meat in advance without dirtying several dishes?
You can prepare the meat and marinade directly in the glass container without the crisper plate. Close with the included storage lid and keep in the fridge for 30 minutes to 16 hours before breading.
Do I need a lot of oil for the breading to brown?
No, a light spray of oil on top before starting, and again on the other side after turning them, is enough to get a lovely colour.
Would you cook it again?
5.0 of 5 based on 1 verdict
Your verdict once you have cooked it